Add a page to the navigation
Once a page has been created and published, the next step is to add it to the navigation so visitors can see and click it in the menu.
-
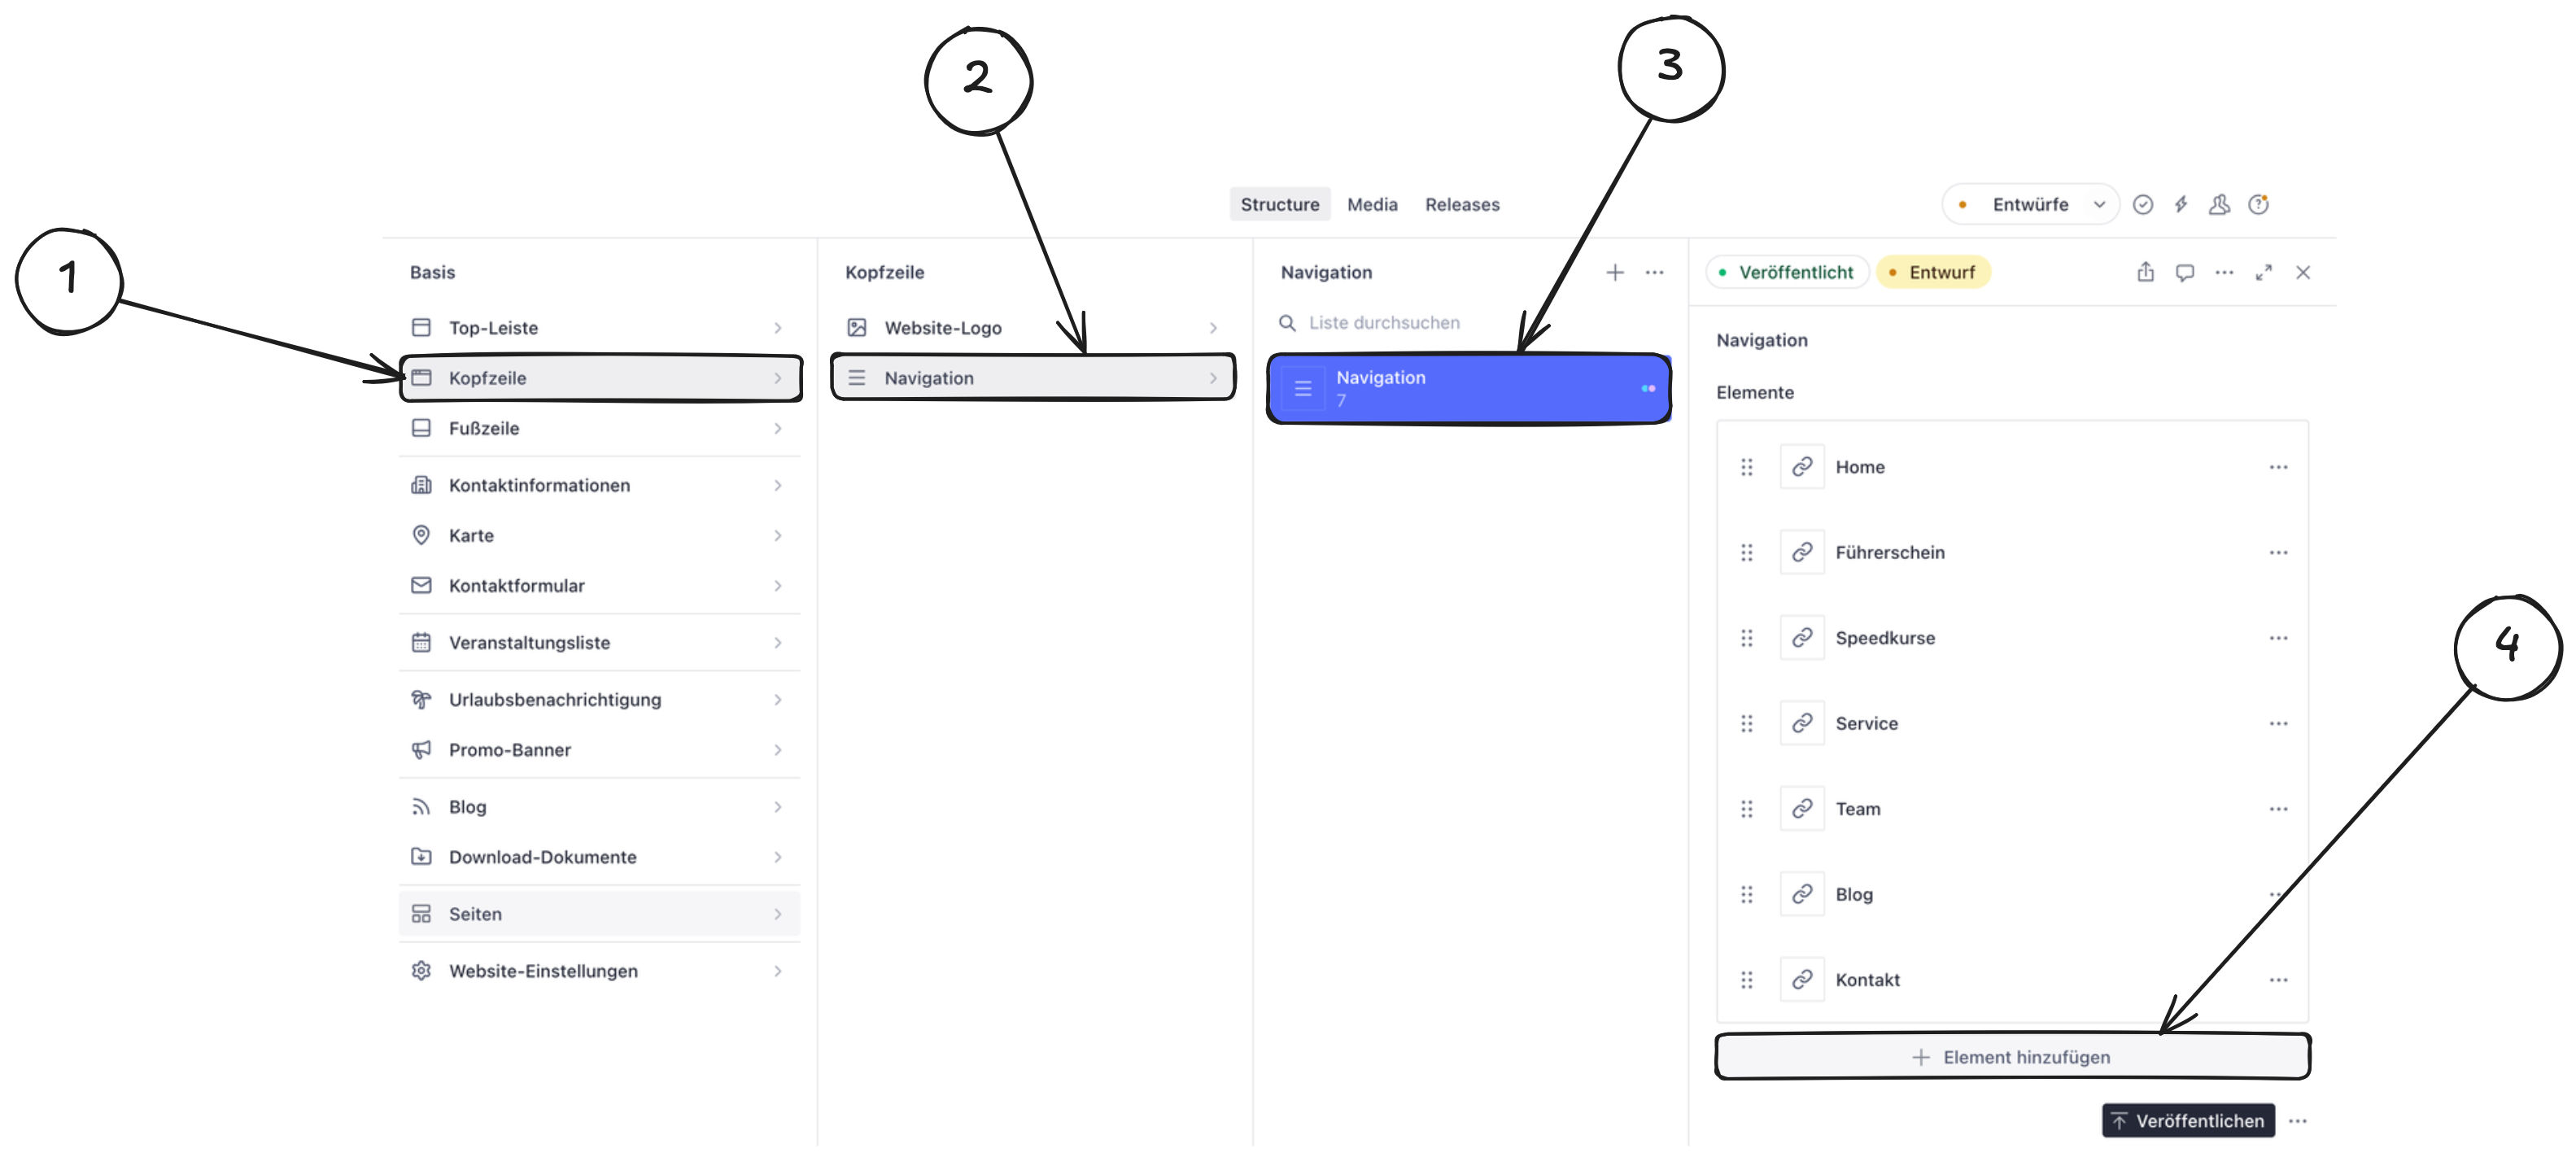
Click “Header” in the left sidebar. This opens the settings for your website’s header area.
-
Select “Navigation” in the middle column. This takes you to the header navigation structure.
-
Click the “Navigation” document in the next column. This document contains all current menu entries.
-
In the “Items” section, click “Add item”. This creates a new navigation entry.
-
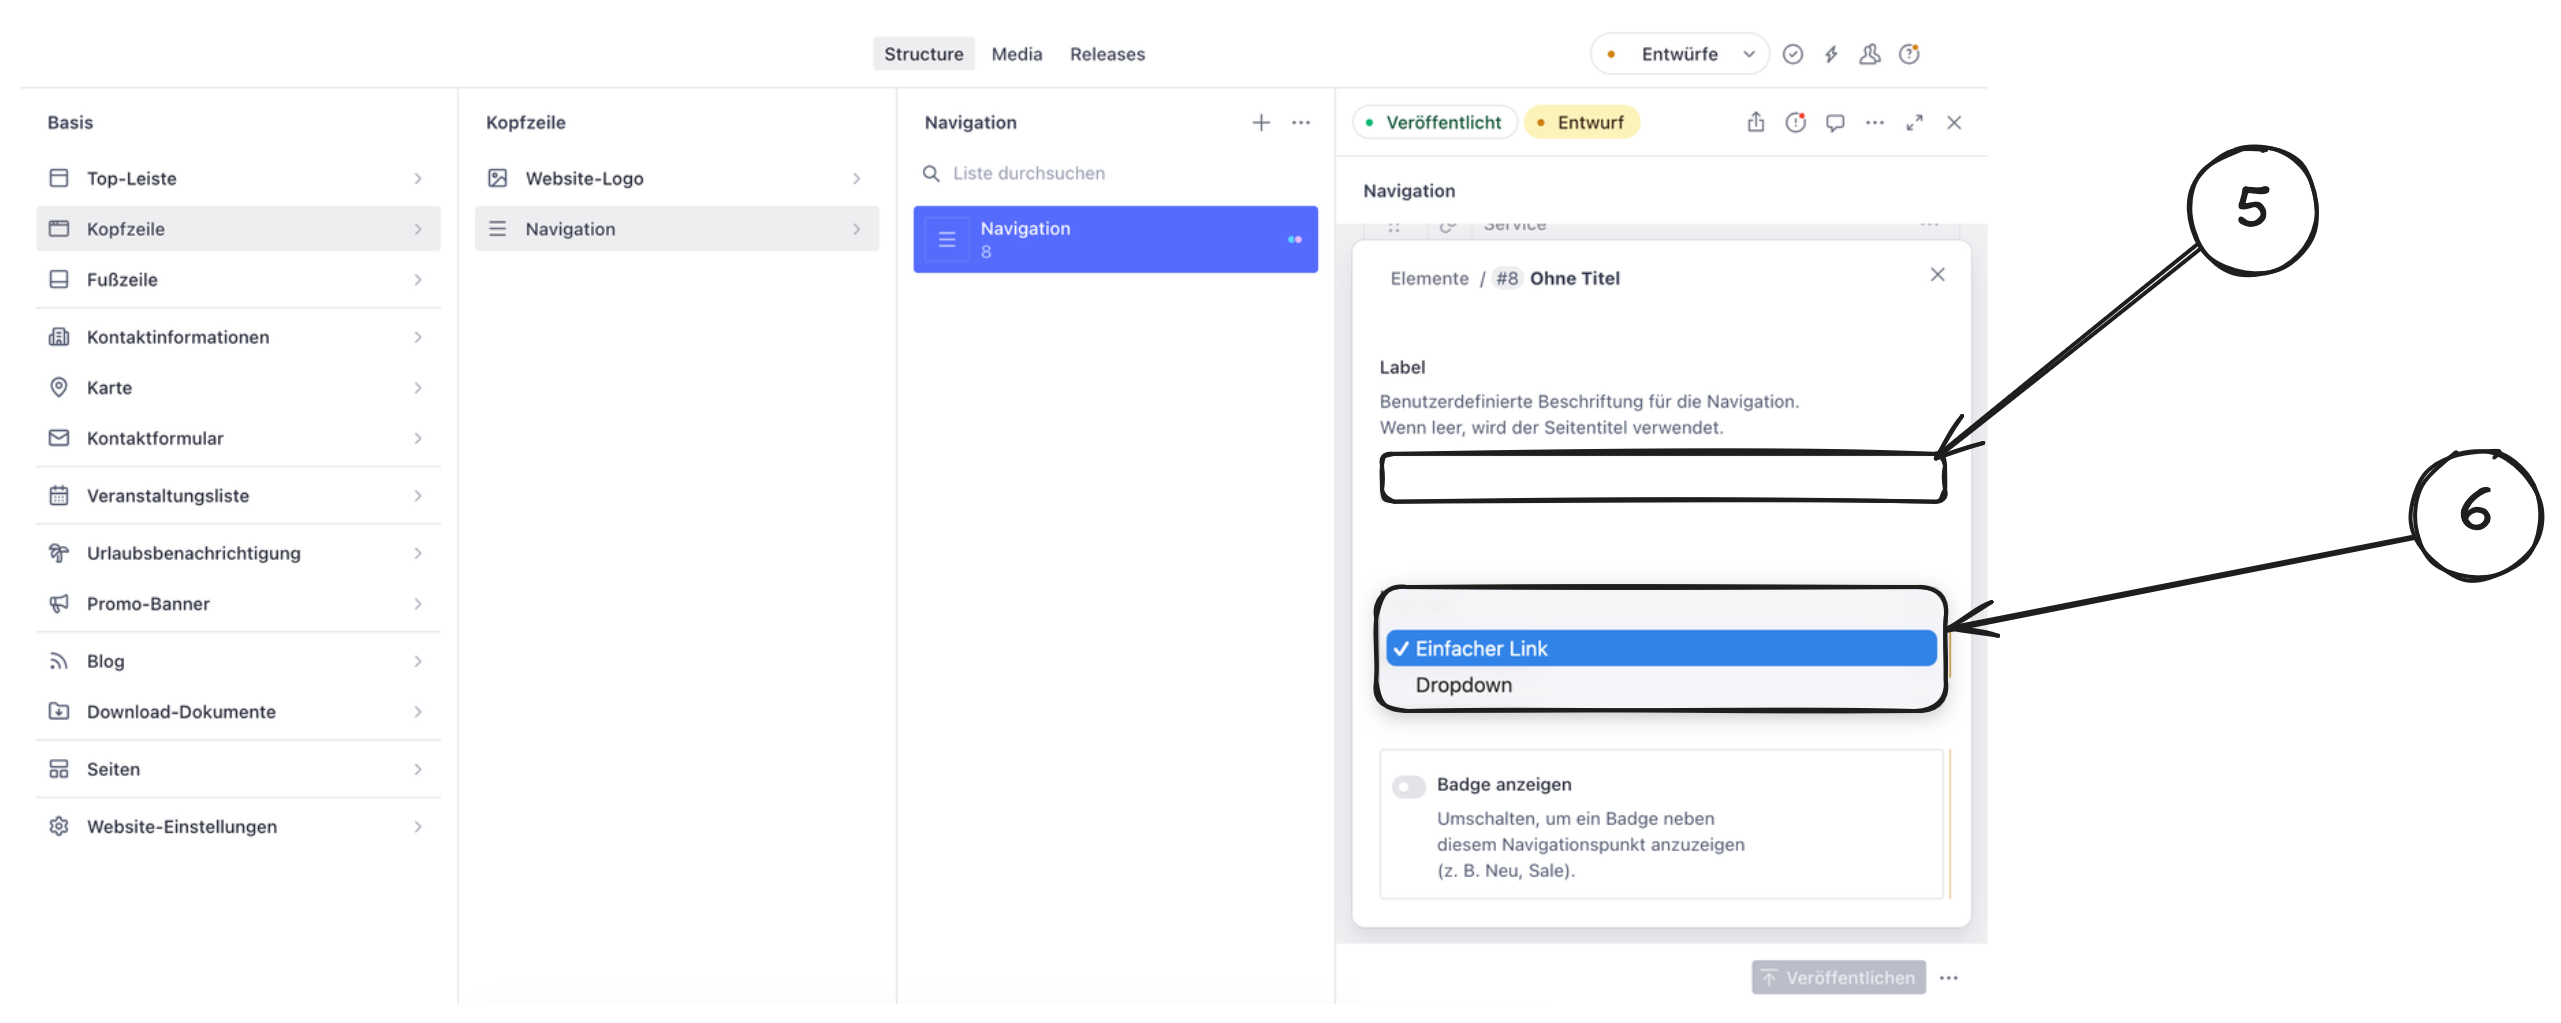
Enter a label. The Label field is a custom name for the navigation. If the field is left empty, the page title is used automatically.
-
For the new entry, choose the link type “Simple link” or “Dropdown”. Use Simple link for a single menu item and Dropdown when you want to group multiple subpages under one parent item.
-
Link the entry to the desired page. In the reference field, choose the page that should appear in the menu.
-
Move the new entry to the desired position. Drag and drop the entry to the correct place in the menu.
-
Click “Publish”. The new navigation item appears on the live website only after publishing.